Thursday, June 17, 2010

Waterproof Application

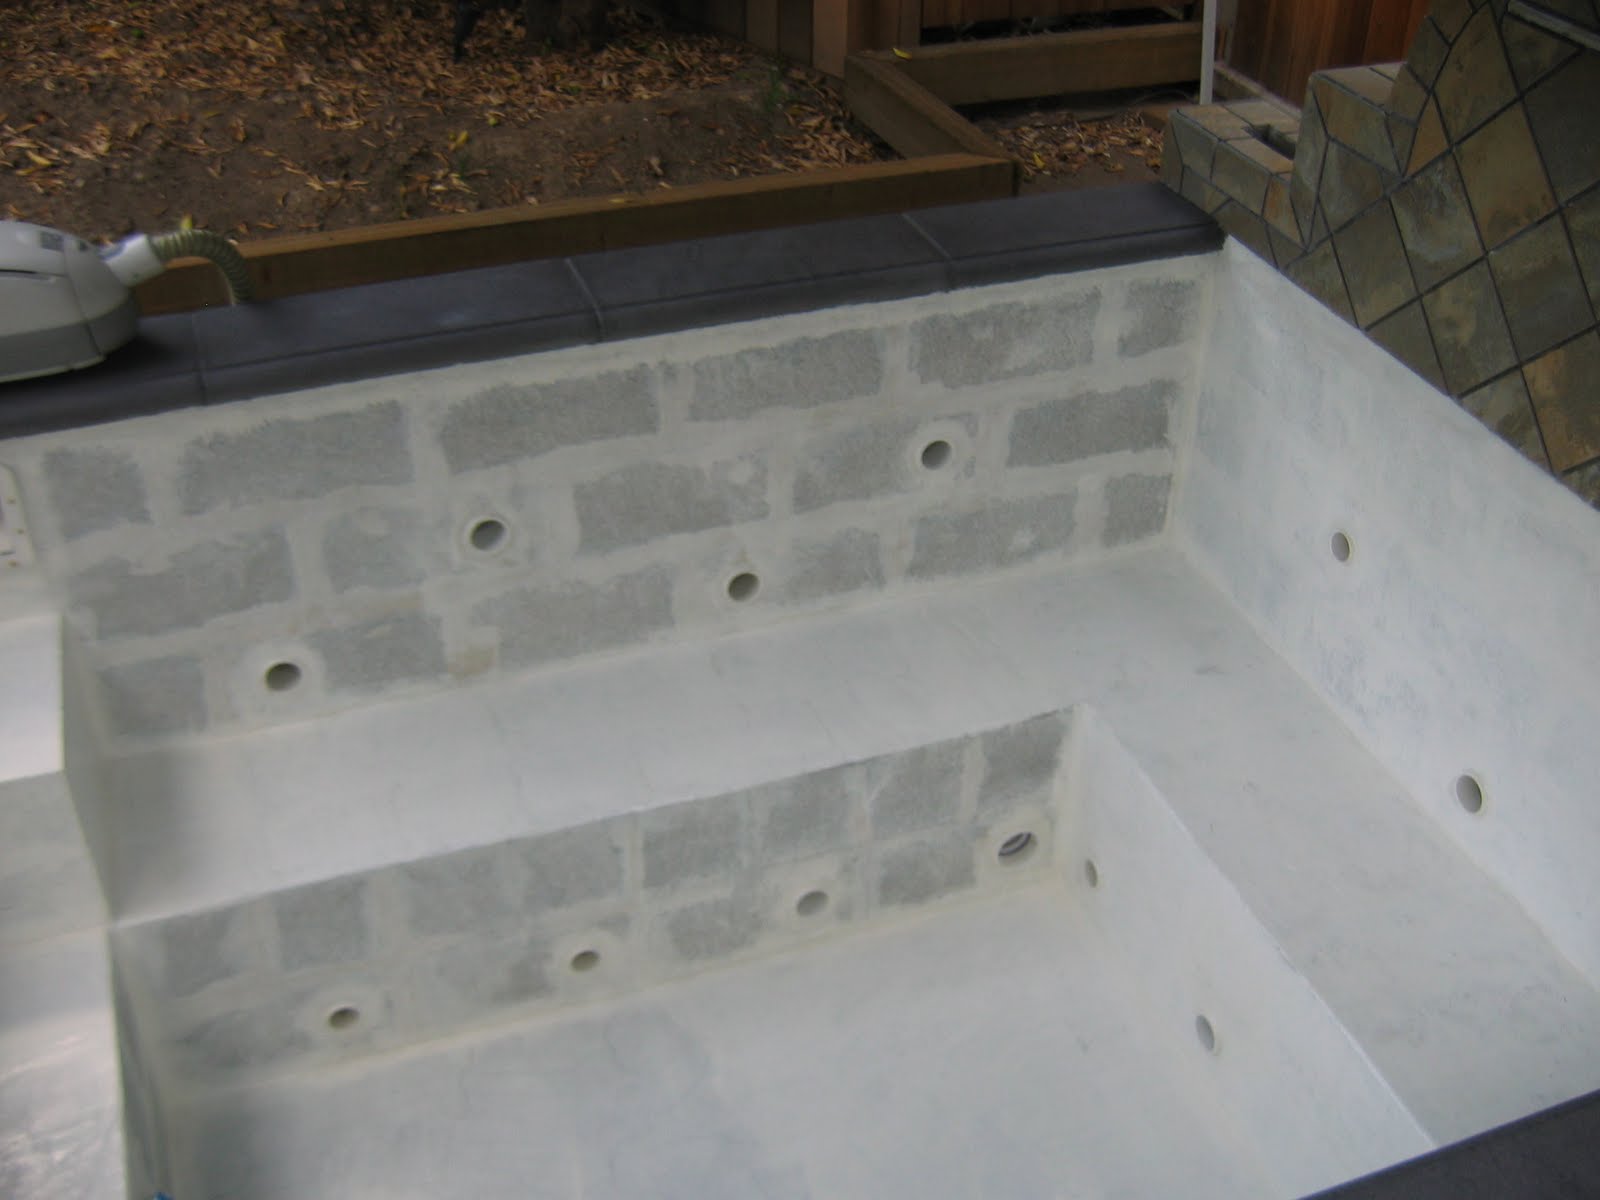
This process of applying the waterproofing to the inside of the spa deserves it's own blog update, mostly because I used so many expletives (even a few new ones) that I literally embarrassed an Australian Sailor (sorry, Mike!).
The products are all made by Sani-Tred, and they are guaranteed forever, which is why I selected them. They are expensive but seem like the best product to waterproof the concrete block and are flexible enough to not fail over time.
The picture shows the products and tools I used. Along with the rubber gloves and various cut up milk cartons were the actual products. The Permaflex base coat requires a separate catalyst/activator that is mixed with the Permaflex to create a prime coat that penetrates the concrete block and provides a surface for the next product to molecularly weld to. The problem with this product is the application process. First of all, it needs to be at least 70 degrees out or the product is too thick to apply. Then it needs to be thinned with Xylene. Good smelling stuff. I rolled the product onto the concrete block, but the product does not absorb into the block without being worked in with a brush, even after being thinned. So it was basically like hand painting the entire inside of the spa-three times! At least I didn't ever paint myself into a corner!
All of the tiles need to be primed with the Permaflex, so I set up the ping pong table and covered it with tile, three times. It's a lot of tile!
If the application of any of the products occurs over the course of a day, you need to clean a film that develops with TSP and Xylene before you can apply the next product in order to assure a proper bond. This I did at least 3 times.
The Liquid Rubber Base (LRB) is applied over the Permaflex, and also has to be mixed with a thickening activator, which is just a nasty process that creates an equally nasty product that smells, is very sticky and sets up quickly. Fun stuff.
This product is used in all of the joints, especially where the walls and the floor meet, and to fill cracks. The instructions suggest shoveling the mixture into a Ziploc bag with a cut out corner in order to apply a consistent bead into the various corners. Yeah right! What a frickin' mess! I made a wooden squeegee with the corner cut out to try and smooth out the corners after my Ziploc emptied product everywhere (including on me), which would have worked better if the consistency of the LRB were thicker. Another long frustrating process that I just worked through until it was acceptable.
One more "Topcoat" of Permaflex and I am ready to place some tile.


Monday, June 7, 2010

Tiling the waterfall front

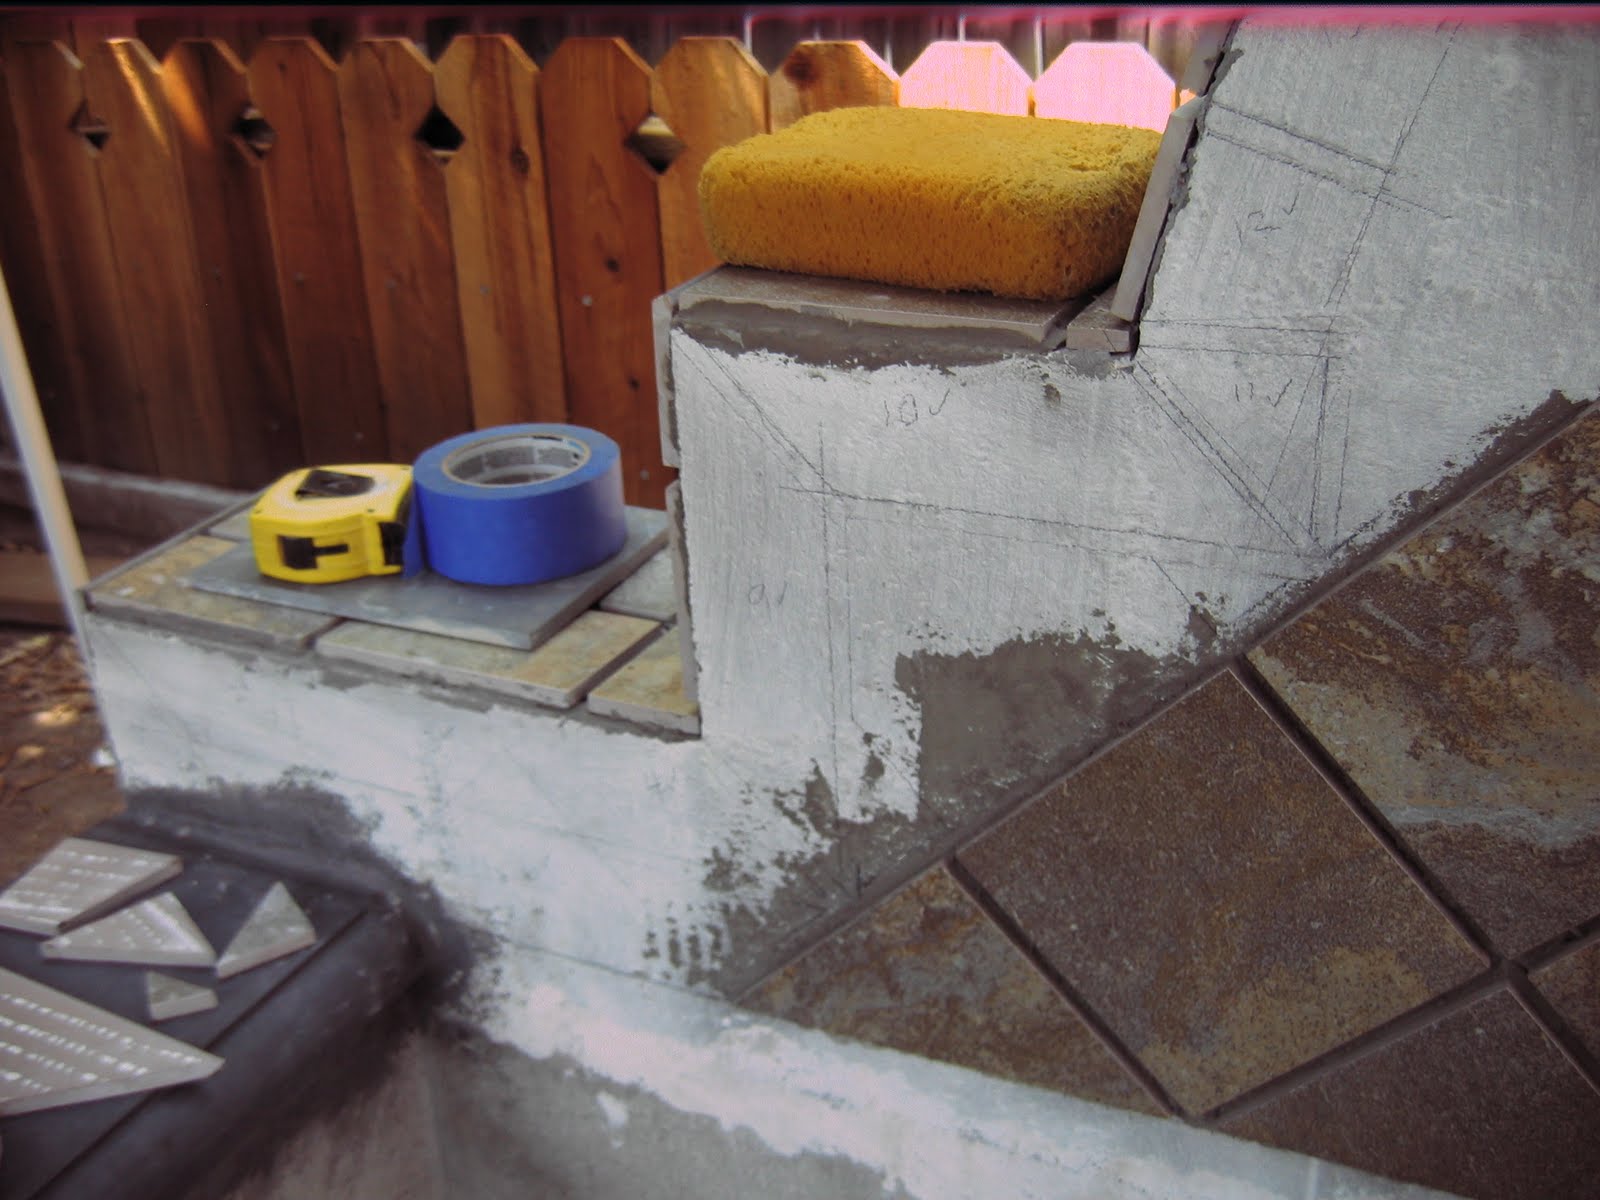
After I practiced my tiling skills on the back of the waterfall, I began working on the front. My goal was to continue the diamond pattern on the front like I had done on the back, and create a cohesive look where the waterfall manifold did not disrupt the pattern.
The challenge was to cut the tiles to create the illusion that the pattern continued, and to calculate where the pattern had to start in order for it to end at the top without using tiny pieces that would look out of place and unplanned.
These tiles did not need to be applied over the waterproofing like the tiles on the inside of the spa, but in order to start this wall above the water line I needed to create a straight line that I could build from. I cut a 1" x 2" and wedged it between the two sides as I placed the tiles and built the pattern up from there.
I made paper dolls (Not really, just seeing if you were paying attention). But I did cut patterns out of paper for each piece and dry placed it on the wall before I cut the tiles. I drew around each piece before I made thin set and made it official-there is no going back after the tile is placed in thin set! You can see the pencil marks if you look closely.
I finished this wall before the Memorial Day Weekend. I thought it turned out pretty cool!
The time I have spent since has been on preparing the inside of the spa for the waterproofing application.


Sunday, May 2, 2010

Finished tiling the back of the waterfall

I was very excited to finish up tiling the major area of the back of the waterfall because it really showed the off the tile and the pattern I decided on.
I have been waiting for the concrete block to dry out between rainstorms to waterproof the inside of the spa.
In the meantime, I tiled the top of the waterfall after the one row around the three outside walls.
I decided to tile the back of the waterfall as a good way to get better for tiling the front of the waterfall that will be a little more complicated and more visible. I fit and placed about 100 tiles on the back of the waterfall. All but 15 tiles had to be cut.
I cannot say that I'm very fast at this, so I just take my time to try to get it right. The border around the top arch was a challenge, but with a little patience and a lot of time (mostly getting up and down and back and forth) it turned out pretty well.
The blue tape is to protect areas from the waterproofing application that is next.


Wednesday, March 31, 2010

Let The Tile Begin

The spa needs to be covered to keep the leaves out and the heat in when it's done. Until then, I need to cover it to keep it dry so I can place the tile.
I don't mind the look of the typical vinyl-covered foam cover when it's on the spa, but I don't want to see it when it's off. I also want to be able to take it off by myself without requiring therapy afterward for a strained back .
After searching the internet for such an animal, I got qoutes for a 3-piece, three or four inch cover for $500 that couldn't be moved without two people and couldn't be stored anywhere that I wouldn't see it.
I concluded that a tonneau type cover that snuggly fit over the spa and connected to the deck would be the best solution, but nobody would make a custom size and take the waterfall side into consideration. It would also require a 4' diameter innertube to float on the water to raise it up in the middle so water wouldn't stretch it and collapse into the spa.
My solution was a custom waterproof tarp that is light enough to put on and take off by one person, roll up and store out of sight. I made a raised center spine from left over PVC to create a ridge for the cover to go over and direct the water off to the sides. It attaches with bungee cords and looks good.
Now that the days are longer (and dryer) I can begin the tile work. The first area is the one row outside the spa that rises out of the deck. When you pick tile from a few tiles put together to simulate the final use you don't really know how it will look until you place a few, but I was very happy after this first row.


Sunday, February 21, 2010

Deck Structure


The rain has kept me from getting to the tiling like I want to, so I began working on the structure for the deck. Like I have often said during the course of the project, it all has to get done, so don't worry about the order.
The support structure for the deck will consist of 4" x 6" pressure treated rafters on top of concrete piers on the perimeter and every 5' diagonally through the body of the deck. I reused 6 piers that I saved that were in my yard when we moved in 25 years ago! I just replaced the wood on top and placed them as I needed.
The top of the block planter foundation also holds rafters in place. I attached 2" x 6" boards all the way around the spa that the rafters and joists will be connected to. The 2" x 6" joists will be placed 16" oc between the rafters and the spa.
Once again I had to move dirt! This time from where the deck will be to provide space to the dirt to prevent potential dry rot under the finished deck. It appears that I will still have a little too much dirt, which is better than not enough dirt!
The deck will cover the pipes closest to the surface and provide access to the plumbing in the unlikely event that I need to get to it.
Digging out for the concrete piers was not hard, but leveling them all to each other has taken some time and patience. They get heavy after awhile and getting up and down a lot shortens my day.
I cut 45 degree angles at the corners and notched one rafter to go over the top plumbing. There are 88' of 4" x 6" pressure treated wood for this main structure, and there will be about two hundred feet of 2" x 6" joists.
I haven't decided on the decking material, but I'm leaning toward a composite to cut down on maintenance.
I haven't nailed anything in place yet, and I don't anticipate finishing up the rest of the deck structure and top boards until the spa gets tiled.


Sunday, January 17, 2010

Equipment Fence and Spa Top Caps

The short days have limited my work to the weekends, but I finished the fence around the equipment a month ago, and then the top caps a couple of weeks after that.
After all of the digging I had done, imagine my surprise to find another concrete obstacle in the ground right where I needed to place one of the footings for the fence!
This project and journey is all about figuring out how to accomplish things when things don't go my way, so I dug into and around the concrete until I could get enough of my own concrete in position for the footing I needed.
The redwood fencing will fade into the existing perimeter fence and arbor over time, and hopefully disappear.
The concrete caps on top of the perimeter came in 2' sections, so I had to get the end pieces cut with a diamond blade. I mixed gray color with the mortar to match the caps, and set the pieces that should be comfortable to sit on when you dangle your feet in the spa!
I attached 2" x 6" pressure treated boards to the outside of the spa where the deck boards will eventually sit. I needed to put them on before I set the tile on the outside to know where to cut the tile. They were a challenge to install. I had to drill into the spa in multiple places to secure the boards. I had to make sure they were straight and at the correct level that would line up with the support on the surrounding planter wall.
I'm working on the design for the surrounding deck. I've never built a deck before. I've done the research and now need to figure out how to build this deck as low as possible in order to get the desired spa height above the deck. I'm planning on a good look to also serve to allow water from wet feet and rain to drain through and away from the walking area. Building the deck will come after the completion of the spa, but up front planning will save time and limit mistakes.
The unit on the wall is for the salt purification system.


Wednesday, November 25, 2009

The dirt disappeared


After months of walking around mountains of dirt, it was time to backfill over the completed plumbing and get reaquainted with the yard. It brought back fond memories of digging it out in the first place and the distinct feeling that it would never be done and that I had made a big mistake!
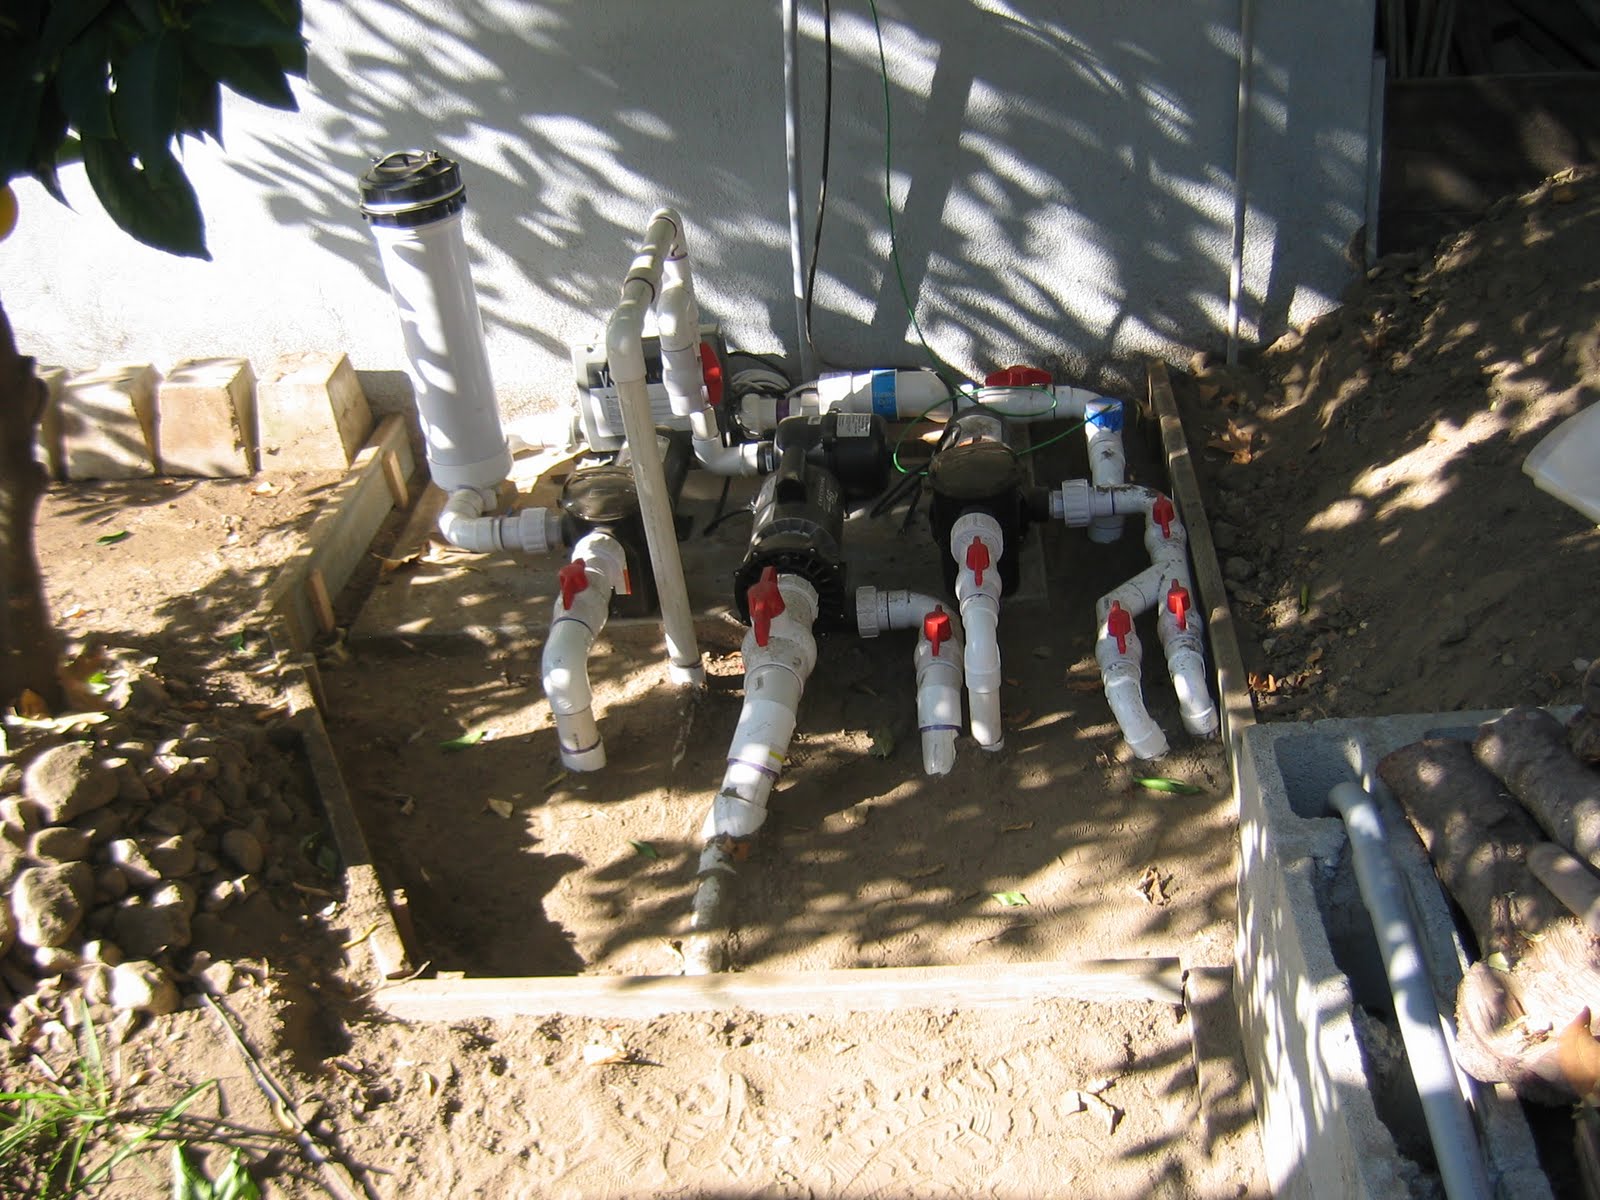
I took a few last pictures of the plumbing before I covered it. It is amazing how much plumbing went into this thing.
I built a border around the equipment because it had to be placed a little lower than the grade of the yard for the pumps to operate properly.
I set mortar around a form that I made that will be where the topside controller will be placed. It needed to be a good fit so that the tile will fit around it snuggly. I ran rigid conduit to put the cord from the controller to the control unit by the equipment just so it will be protected.
I ordered the concrete cap for around the top of the spa, and we picked out tile that has the look of stone that will be a very exciting effect.


Followers