Sunday, February 21, 2010

Deck Structure


The rain has kept me from getting to the tiling like I want to, so I began working on the structure for the deck. Like I have often said during the course of the project, it all has to get done, so don't worry about the order.
The support structure for the deck will consist of 4" x 6" pressure treated rafters on top of concrete piers on the perimeter and every 5' diagonally through the body of the deck. I reused 6 piers that I saved that were in my yard when we moved in 25 years ago! I just replaced the wood on top and placed them as I needed.
The top of the block planter foundation also holds rafters in place. I attached 2" x 6" boards all the way around the spa that the rafters and joists will be connected to. The 2" x 6" joists will be placed 16" oc between the rafters and the spa.
Once again I had to move dirt! This time from where the deck will be to provide space to the dirt to prevent potential dry rot under the finished deck. It appears that I will still have a little too much dirt, which is better than not enough dirt!
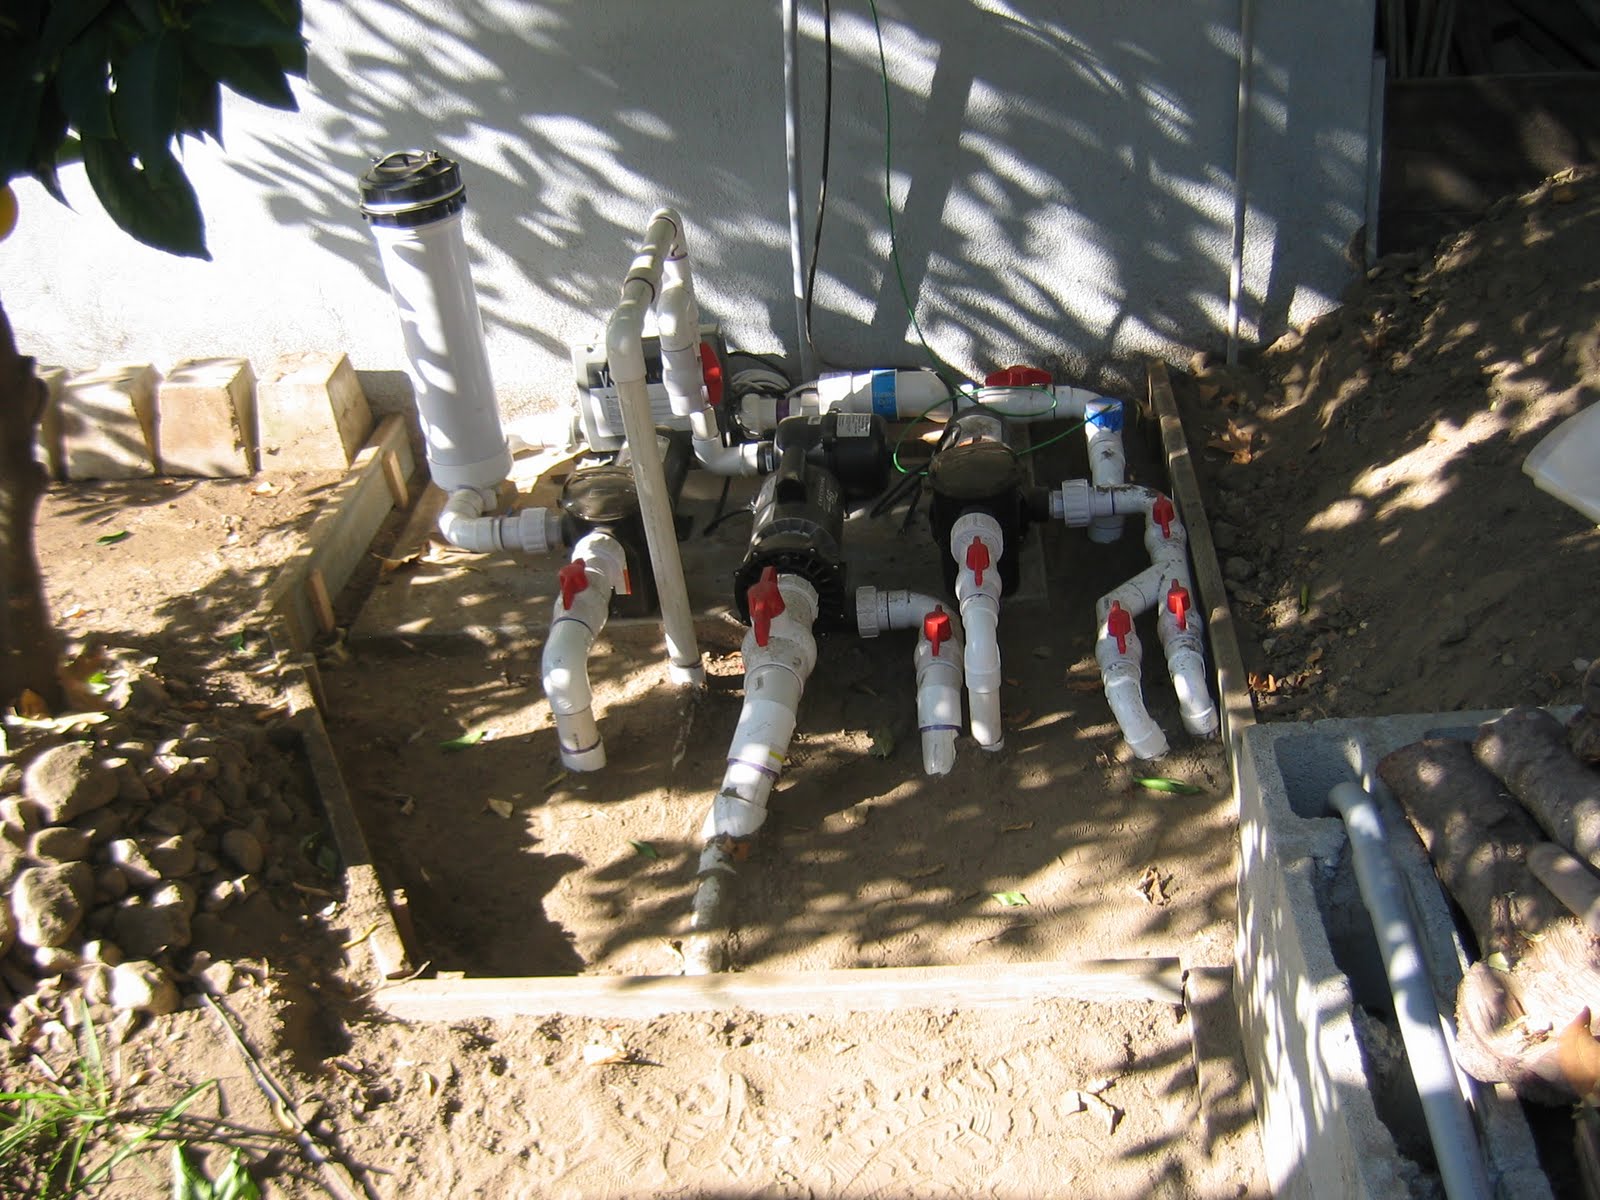
The deck will cover the pipes closest to the surface and provide access to the plumbing in the unlikely event that I need to get to it.
Digging out for the concrete piers was not hard, but leveling them all to each other has taken some time and patience. They get heavy after awhile and getting up and down a lot shortens my day.
I cut 45 degree angles at the corners and notched one rafter to go over the top plumbing. There are 88' of 4" x 6" pressure treated wood for this main structure, and there will be about two hundred feet of 2" x 6" joists.
I haven't decided on the decking material, but I'm leaning toward a composite to cut down on maintenance.
I haven't nailed anything in place yet, and I don't anticipate finishing up the rest of the deck structure and top boards until the spa gets tiled.


Sunday, January 17, 2010

Equipment Fence and Spa Top Caps

The short days have limited my work to the weekends, but I finished the fence around the equipment a month ago, and then the top caps a couple of weeks after that.
After all of the digging I had done, imagine my surprise to find another concrete obstacle in the ground right where I needed to place one of the footings for the fence!
This project and journey is all about figuring out how to accomplish things when things don't go my way, so I dug into and around the concrete until I could get enough of my own concrete in position for the footing I needed.
The redwood fencing will fade into the existing perimeter fence and arbor over time, and hopefully disappear.
The concrete caps on top of the perimeter came in 2' sections, so I had to get the end pieces cut with a diamond blade. I mixed gray color with the mortar to match the caps, and set the pieces that should be comfortable to sit on when you dangle your feet in the spa!
I attached 2" x 6" pressure treated boards to the outside of the spa where the deck boards will eventually sit. I needed to put them on before I set the tile on the outside to know where to cut the tile. They were a challenge to install. I had to drill into the spa in multiple places to secure the boards. I had to make sure they were straight and at the correct level that would line up with the support on the surrounding planter wall.
I'm working on the design for the surrounding deck. I've never built a deck before. I've done the research and now need to figure out how to build this deck as low as possible in order to get the desired spa height above the deck. I'm planning on a good look to also serve to allow water from wet feet and rain to drain through and away from the walking area. Building the deck will come after the completion of the spa, but up front planning will save time and limit mistakes.
The unit on the wall is for the salt purification system.


Wednesday, November 25, 2009

The dirt disappeared


After months of walking around mountains of dirt, it was time to backfill over the completed plumbing and get reaquainted with the yard. It brought back fond memories of digging it out in the first place and the distinct feeling that it would never be done and that I had made a big mistake!
I took a few last pictures of the plumbing before I covered it. It is amazing how much plumbing went into this thing.
I built a border around the equipment because it had to be placed a little lower than the grade of the yard for the pumps to operate properly.
I set mortar around a form that I made that will be where the topside controller will be placed. It needed to be a good fit so that the tile will fit around it snuggly. I ran rigid conduit to put the cord from the controller to the control unit by the equipment just so it will be protected.
I ordered the concrete cap for around the top of the spa, and we picked out tile that has the look of stone that will be a very exciting effect.


Wednesday, November 11, 2009

Placing the equipment

I finished priming and gluing all of the pvc plumbing for the spa a couple of weeks ago. I had "Dry fitted" most of the plumbing around the spa, then I took all of the pieces apart to prime and glue them for real.
When I first calculated the size of the hole I needed to dig I didn't want to dig it any bigger than I had to for obvious reasons. I allowed just enough room for the plumbing around the spa and not much room to work, so I got into some pretty interesting positions trying to get some leverage to glue the pipes together. I actually got smart and bought some inexpensive gloves to use to do the priming and gluing. I really missed getting that glue and purple stuff all over me like I usually do!
I will eventually report on how many hundreds (Thats right, hundreds) of feet of 1, 1 1/2, 2 and 2 1/2 inch pvc pipe that are in that hole, not to mention the dozens of fittings! It is too bad that all of this sculpture is going to be buried, but I guess I'll always have the pictures.
I put a lot of thought into the order that I had to put the pipes in, and the most efficient route for them to take to maximize the water flow to and from the equipment. Now I had to design the placement of the equipment on the slab that I poured to maximize its efficiency and fit all the plumbing to and from the equipment.
The pumps had to be placed so their intakes were below the filled water line for them to prime properly. Pumps need to have the most efficient flow to them because they are better suckers than pushers (Technical terms I've picked up along the way).
Every item of equipment needs to be able to be isolated for servicing, so ball valves are used so I don't have to drain the spa to service something.
The air line from the blower to the spa jets has a loop to keep condensation from going back into the blower.
I had to carefully plan where the lines from the spa came in from the spa and connected to the equipment. Its one of those things that looks so simple and right if its done correctly, but took so long to figure out!
I haven't made any of the electrical connections yet. In fact, I haven't even run the service to the equipment location yet. I think I'm afraid. But I'm not really concerned about it right now.
The days are short now and there is no time during the week to do anything in the daylight. But I've ordered the waterproofing materials and we're looking at wall caps and tile.
The next step is to fill the areas around the interior housings in the spa and do the waterproofing.

Monday, September 28, 2009

Got pipes?

The next step was to paint a product called Dryloc on the outside walls and waterfall front where moisture might be an issue.
The inside gets a couple of coats of a high tech product that waterproofs the blocks by seeping into the pourous concrete and creating a flexible waterproof membrane that I can tile over.
But first it was time to cut some pvc and dry fit the plumbing for the various functions of the spa.
Everything went according to the plan I made. I'm missing some fittings that I had to order online, but generally it went pretty well. It is amazing how many feet of pipe are going into this hole. I'll do the calculations and get back to you!


Saturday, September 19, 2009

Forming the waterfall

I made a couple of braces to make sure the waterfall manifold was level before I made the forms that would hold the concrete in the shape I had designed for the top of the waterfall.
Once again I underestimated how much concrete this top portion would take, and quickly sent Tommy to get 3 more 60 lb. bags to add to the 3 I already had. That turned out to be enough. I also had half bag of mortar handy to fill in the gaps I knew would show up when I took off the forms.
Once again, I learned a few things in my process. Inexpensive 3/8" plywood is not thick enough to use as a form. It buckled and warped-but I made it work. Concrete with little rocks is harder to finish on a vertical shape than just mortar. Again, I made it work but it was a lot of work. I don't really know how to get concrete in all of the areas inside of a form. I thought I did, but I don't.
So here I am, 5 months after I marked the location of the spa on the grass, with the basic structure done. I'm very excited and I've started thinking about tile options.
Lots of work still to go, and the days are getting shorter, but it's looking pretty good.
I didn't plan it, but it's kinda cool that I accomplished something like this on my dad's 100th birthday. Happy birthday, Pop!


Spa side controller

The spa side controller could have gone anywhere convenient to use from the spa. I want to put it in the first block up in the waterfall wall because it will ne easy to use, easy to get to if it needs repairing, and out of the way of whatever cover I put on the spa.
I used a notched block with the center plenum already cut down which will accomodate the control.
I made a couple of blocks so I could partially fill the block and still leave enough space to easily install the controller from the top after I put in the tile.
I'll have to drill a hole for the cord from the controller to the control unit to finish off this detail.

Followers